Quick Summary
Good bag product photography shows size, structure, material, and color accurately and keeps them consistent across a range. Small catalogs should keep shooting; for large ones, a digital pipeline can replace traditional bag photoshoots.
A bag is harder to photograph than it looks. Its structure collapses, hardware throws glare, color shifts under different light, and its size is hard to judge on a screen. Shoppers cannot pick it up, so the photos are their only inspection. When the photos miss, you lose the sale or get the bag back.
Most bag product photography guides cover one handbag on one table. Your reality is dozens of product families, many colorways, several channels, and new seasons every year. This guide is built for that type of catalog.
Here’s the path we’ll take: what to shoot for bag product photography, how to shoot it, where the images have to work, how to run all of it at scale, and when it’s time to stop shooting and go digital.
Who This Bag Photography Guide is for
Brand-side ecommerce, creative, wholesale, and production teams with real catalogs get the full path. Makers and small brands can use the shot list, production craft sections, and decision framework.
What a Bag Product Page Needs to Show: Size, Capacity, Structure & More
Before we get into how to shoot, we need to settle what a bag listing has to show. A shopper can’t pick the bag up, so they judge six things from the images alone: size and capacity, structure, materials, features, carry comfort, and true color. Each bag product image should answer at least one, and the gallery should answer all six.
Shopper question |
The image that answers it |
|---|---|
How big is it? |
Scale shot on a person, plus a “what fits” shot |
Does it hold its shape? |
Hero three-quarter view, plus a side view |
What is it made of? |
Material macro showing grain or weave |
What features does it have? |
Interior, pocket, and compartment details |
Is it comfortable to carry? |
Strap, handle, and back-panel close-ups |
Is that the real color? |
Packshot edited against the physical swatch |
Most of those answers come straight from the right shot. Size and capacity are the exception. They need more than one image, so they get a closer look.
How to show bag size and capacity in product photos
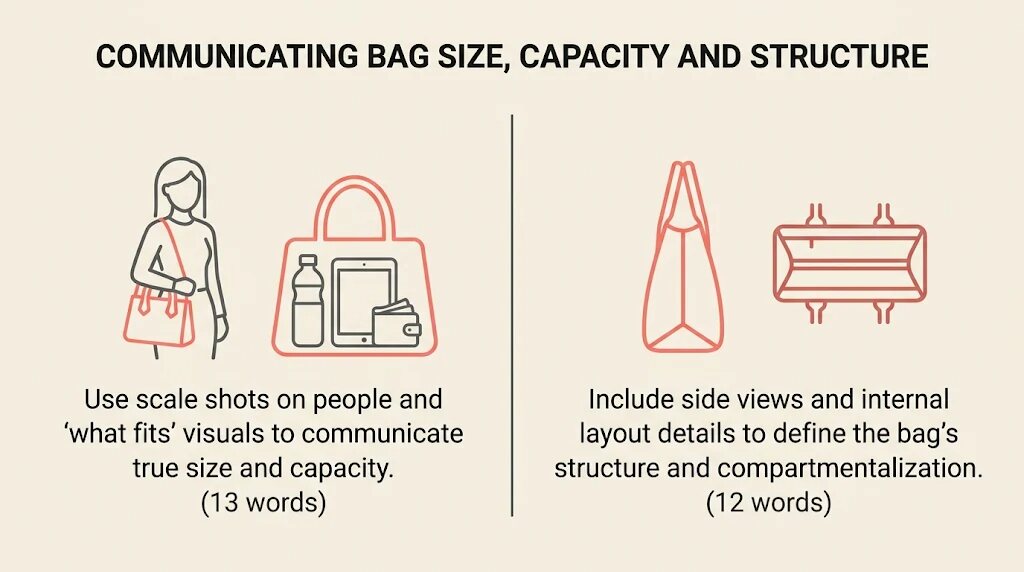
To show size and capacity, combine printed dimensions that match the spec sheet, a scale reference the shopper already knows, and a shot of what fits inside. For luggage, add cabin-size context, and link the airline’s official page if you quote a limit.
- Printed dimensions. Height by width by depth, for example, 17 x 12 x 6 in (43 x 30 x 15 cm), matching the spec sheet exactly.
- Scale references. A hand, a model of stated height, or a 15-inch laptop. Props of unknown size mislead.
- A “what fits” shot. Typical contents, with capacity in liters.
Three mistakes undo this: wide-angle distortion that inflates the bag, inconsistent scale between images, and dimensions that do not match the photo. A 3D viewer or AR placement can also show true size (see product page media below). Samsonite’s site is a good model. In a joint webinar, Fibbl’s team pointed to its clear size guides and cabin-size tags. When a photo leaves size open, the product tends to come back.
Bag Photography Shot List by Bag Type
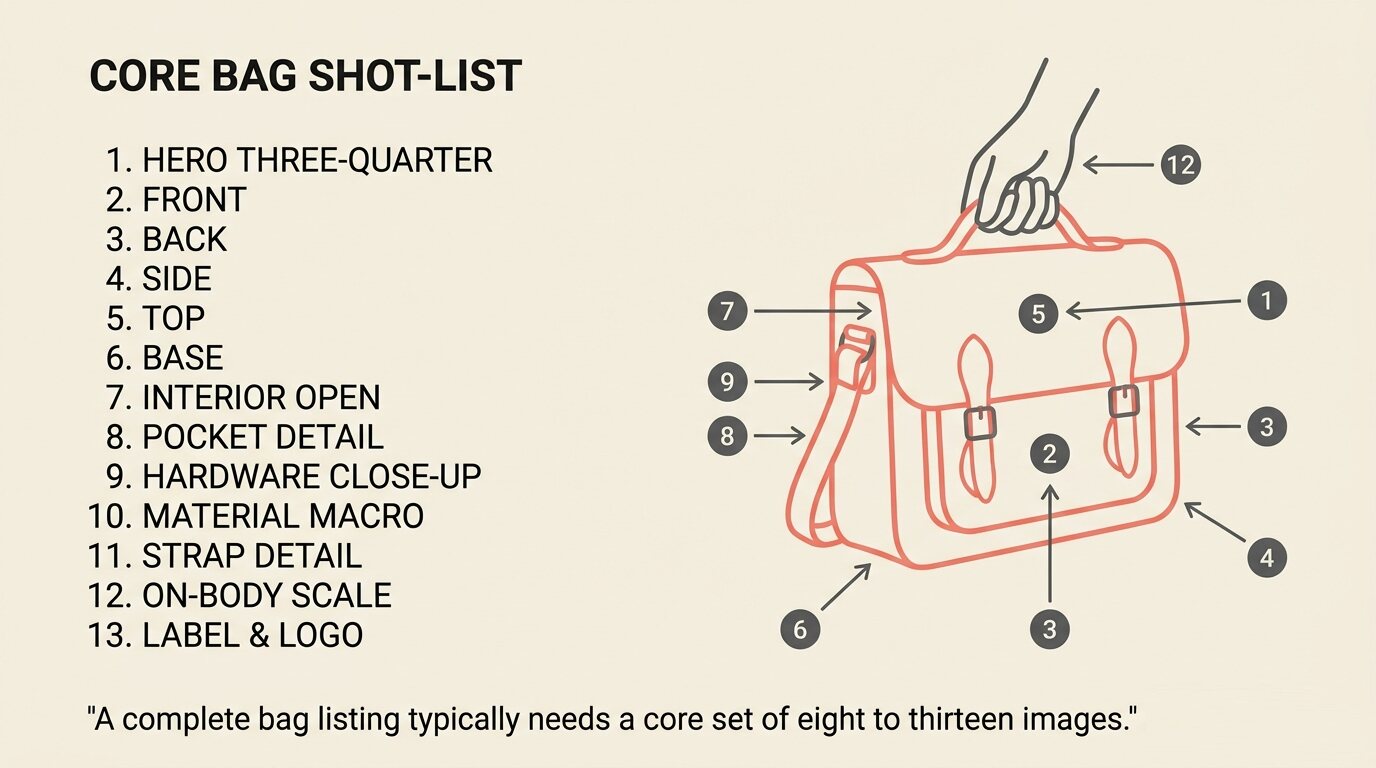
Now that you know what shoppers need, the next step is turning it into a shot list. A complete bag listing typically needs eight to ten images, plus extra shots for the bag type. Start with these thirteen views and pick the ones that answer the six questions above:
- Hero three-quarter view
- Front
- Back
- Side
- Top
- Base
- Interior, open
- Pocket and compartment detail
- Hardware and zipper close-ups
- Material macro
- Strap and handle detail
- In-hand or on-body scale shot
- Label and logo
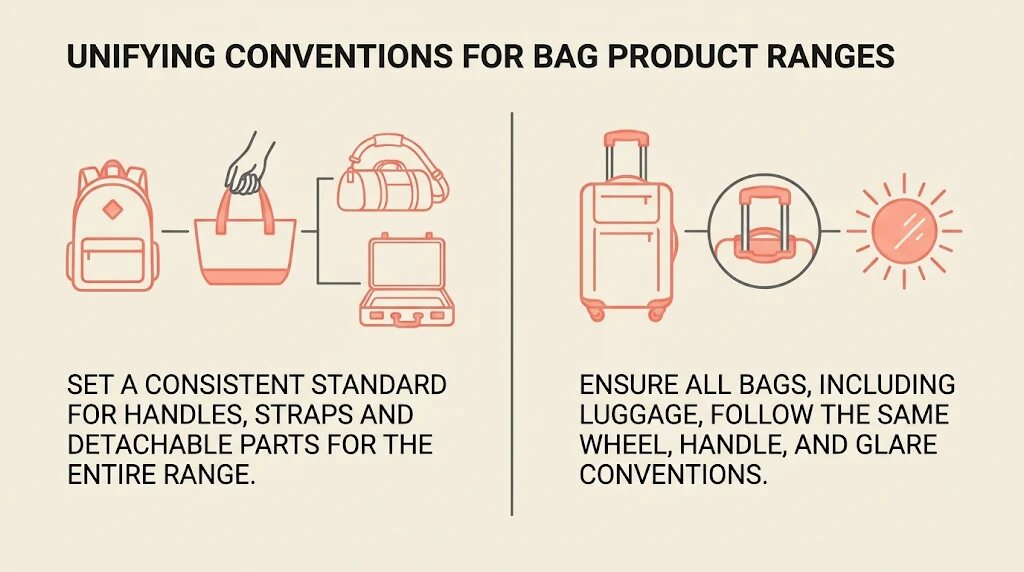
Getting these shots takes more than pointing a camera, because different bag types need to be set up and positioned in different ways. The notes below cover what to show and how to style each type, drawing on Fibbl’s prep guide for scanning bags and luggage. Most of it carries over to a regular shoot. Prep that applies to every bag, such as stuffing, steaming, and color matching, comes later in this guide. One rule holds for every type. Choose one handle, wheel, and strap convention per range and keep it for every product.
Backpack and rolltop product photography
Backpack product photography needs the front, back panel with straps, side, top with the handle up, and interior, plus the hip belt if there is one. Fasten the sternum strap and tuck it on the lower half. For rolltops, keep the roll straight across the bag with one clean fold, and add an unrolled shot to show capacity.
Tote bag and handbag photography
Totes and handbags put more weight on shape and openings. Show them open and closed, with the base and lining clearly visible. Shoot the strap dropped, and show it attached and detached, which is a staple of handbag product photography. In tote bag photography, the open top also shows capacity. The same shots cover purse product photography.
Duffel and weekender bag photography
Duffels bring long straps back into play, along with a lot of volume. Handles can show up or down, depending on strap length and stability. Show the shoulder strap attached in one shot, with the end pockets, base, and interior volume visible.
Briefcase and laptop bag photography
Briefcases are more structured, so the focus moves to handles, straps, and the laptop compartment. Keep the handles up. Remove any detachable strap for the main image and show it separately. Laptop bag photography should show the compartment with a laptop of stated size, plus the front organizer.
Washbag and toiletry bag photography
Washbags and toiletry bags are small, so scale and the interior matter most. Shoot them closed and open, with the handle or wrist strap and the waterproof lining visible. One scale shot with typical contents does the trick.
Hiking and technical pack photography
Hiking and technical packs have plenty of adjustment points, so the styling is largely about keeping them tidy. Keep the waistband closed in the main image and show it open as a detail. Show the side pockets, straps tucked, and the back ventilation system.
Hard-shell and soft-shell luggage photography
Luggage and suitcase photography starts from the same shot list, plus the handle extended, a wheel close-up, the open interior, and a person-height scale shot. How to set up and light them gets its own section later, because wheels, telescoping handles, and large reflective surfaces need their own handling.
How to Photograph Bag Features and Materials
Whatever the bag type, some shopper questions can only be answered with a close-up. Will my laptop fit? Does the strap adjust? What does the leather grain look like? Feature and material shots answer the questions that stop a purchase, so give each key feature its own clear image.
- Interior and pockets: Open the bag fully and light the inside. Show dividers, sleeves, and pockets in use.
- Straps and back panels: Show adjusters, padding, and attachment points.
- Hardware: Zippers, buckles, and rings, sharp and glare-free.
- Luggage parts: Wheels, handles, and locks.
- Material macros: Light at a low angle so weave and grain read clearly.
Beyond the shots themselves, two things on the page need care:
i) Callouts: Keep text to a few words, legible on a phone, and never over the logo or the edges of the bag.
ii) Sustainability and durability claims. Show proof, such as labels or certifications, and keep claims accurate. For US environmental claims, check the FTC’s Green Guides. Durability works the same way: Samsonite’s testing lab, shown in the webinar, tests zippers and wheels and drop-tests frozen suitcases.
How to Prepare and Style a Bag for a Product Photoshoot
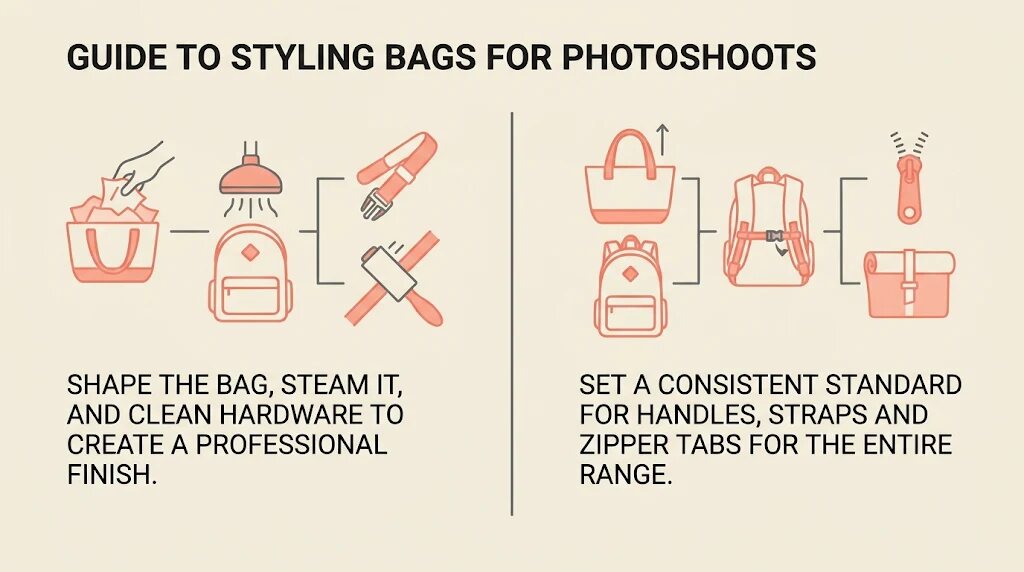
Before any shoot, the bag itself has to be ready to capture the best shots. That’s why it’s so important to discuss the bag prep step. A bag that is shaped, steamed, clean, and styled to a fixed convention needs far less retouching and matches the rest of the range.
- Shape and stuffing. Fill the bag with tissue or soft packing paper so it holds its natural shape. Aim for full but not overstuffed, with corners pushed out, creases smoothed, and the bag slightly inflated rather than saggy. Fibbl’s prep guide uses the same rule to ready bags for scanning. Avoid fillers that can transfer ink onto light fabrics. Stuffing also signals capacity to the shopper.
- Steaming and cleaning. Steam out creases, lint-roll fabric, and wipe hardware. Remove tags and stickers and trim loose threads. Some coated fabrics and leathers react badly to steam, so test a hidden area first.
- Zippers, tabs, and straps. Let zipper tabs hang downward or hide them. If a tab would cover a logo, move it aside, and if it cannot hang, lay it flat over the zipper. Tuck extra straps along their natural angle. For straps that need to float, suspend them on fishing line and remove it in post.
- Handles and special bag types. Handle, strap, and roll styling for each bag type is covered in the shot list above.
- Color matching and a style guide. Keep the physical swatch beside the bag and compare it on screen. Write a one-page style guide for handle, strap, zipper, and wheel conventions so every shoot matches the last.
Next, let’s discuss the lighting and camera setup requirements for bag photography.
Lighting and Camera Setup for Bag Photography
The right lighting and camera setup for bag photography is critical if you want good shot results. Use large, soft, controlled light that shows shape and texture without hot spots, then adjust it by material. Leather, nylon, patent finishes, and polycarbonate shells each fail differently under the same setup.
Work with large softboxes or diffused light, never direct flash. Use reflectors for fill and side light for texture, and mark light positions so you can repeat the setup.
Material |
Problem |
What to do |
|---|---|---|
Smooth and full-grain leather |
Hot spots, lost grain |
Large diffused source at a slight side angle; polarize stubborn glare |
Nylon and technical fabrics |
Flat sheen, color shift |
Soft frontal light; check color against the swatch |
Canvas and textured weaves |
Texture vanishes in flat light |
Low-angle side light to raise the weave |
Patent and coated finishes |
Mirror reflections of lights and room |
Cross-polarized light, flags, very large sources |
Metal hardware |
Glare, reflected surroundings |
Polarize; black cards for defined edges |
Polycarbonate hard shell |
Long streaks on curves and ridges |
Very large sources, flags, polarization; angle the case |
Cross-polarized lighting is the standard way to cut reflections on glossy surfaces. Polarizing film on the light and a polarizing filter on the lens, rotated to cancel the glare. Fibbl’s ARC scanner uses the same principle to capture glossy leather and metal hardware.
Shoot on a tripod, tethered to check focus and color at full size. Use a focal length that keeps proportions true, stop down for depth of field, and focus-stack hardware close-ups. Your photographer should set exact lens and aperture choices.
Put a gray card or color checker in the first frame of every setup and lock white balance.
How to Photograph Luggage and Suitcases (Hard-Shell and Soft-Shell)
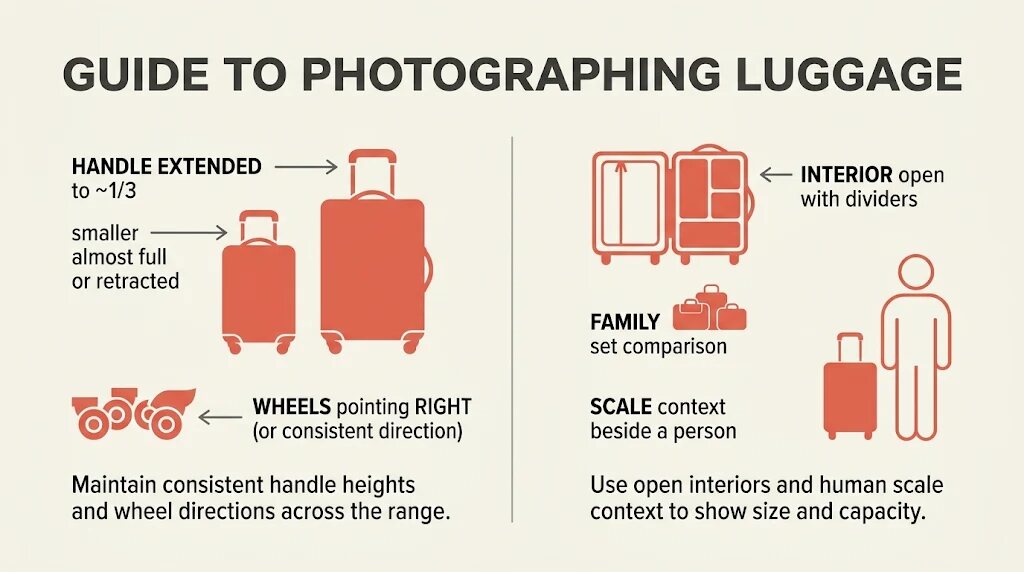
Luggage photography adds moving parts, large reflective surfaces, and tight consistency across sizes. It’s important we discuss it separately. Decide handle height, wheel direction, and glare control once, then apply them to every case in the range.
- Handle position. Fibbl’s prep guide shows larger cases with the handle extended to about one-third of its length and smaller cases almost fully extended, or fully retracted if your brand prefers. What matters is consistency.
- Wheel orientation. Pick one direction, left, right, backward, or inward, and use it on every product. The guide’s default is wheels pointing right.
- Reflections on hard shells. Ridged shells and metallic finishes catch light in long streaks that follow the ribs. Use very large soft sources, flags to block reflections, and polarization, then angle the case until reflections sit where they don't hide detail.
- Soft-shell shape and zippers. Fill soft cases so panels do not cave in. On suitcases, zipper tabs are often fastened into the lock; keep them still and tidy.
- Interior, expansion and sets. Shoot the open interior with dividers and compression straps, the expansion zip in both states, and carry-on, medium, and large together so shoppers see the family at a glance.
- Scale. Add cabin-size context and a person-height reference, as in the size section. In suitcase photography, a person beside the case answers the size question faster than any number.
Lifestyle and On-Model Bag Photography
Everything above is linked to producing clean catalog images. However, a high converting product listing page contains more than just catalog images. Lifestyle images are a must for bag photography as well.
Lifestyle images show scale, use, and aspiration. They support the catalog set without replacing it, so use them where carry position or real-world context needs a person to read.
Use a model when carry position matters: shoulder bags, crossbody bags, and backpacks. Build the bag photoshoot around use cases, and keep model height consistent so scale stays comparable. Some bag photoshoot ideas:
- Commute: a laptop bag on a train platform
- School: a backpack on a model walking, straps adjusted
- Weekend away: a packed duffel on a car seat
- Airport: a carry-on rolling through a terminal
- Trail: a technical pack on a mountain path
- Evening: a handbag at a table, strap drop visible
AI-generated scenes are increasingly used for bag photography ideas like these. The AI section covers where that works later in this guide.
Bag Photo Editing: Color Accuracy, Retouching and File Specs
Once the shoot is done, the files still need work, and editing is where good photography is easiest to undo. Editing should clean the image, never change the product. Fix dust, lint, and creases, and leave grain, proportions, hardware, and color exactly as they are on the physical bag.
- Color accuracy. Edit on a calibrated monitor with a consistent color profile, and compare against the physical swatch. Samsonite’s team made the point in the webinar: color, material, and detail must match reality, or customers are disappointed and send the item back.
- Retouching limits. Remove dust, creases, and lint. Do not smooth leather grain, change proportions, or alter hardware; each change increases return risk.
- Backgrounds and consistency. Clean cut-outs, natural shadows, and the same crop and aspect ratio across the range.
- File formats and naming. Keep layered masters, export JPEG or WebP for the web, and name files by product, color, and view, for example, tote24-black-front.jpg. Take resolution minimums from each marketplace’s rules, covered below.
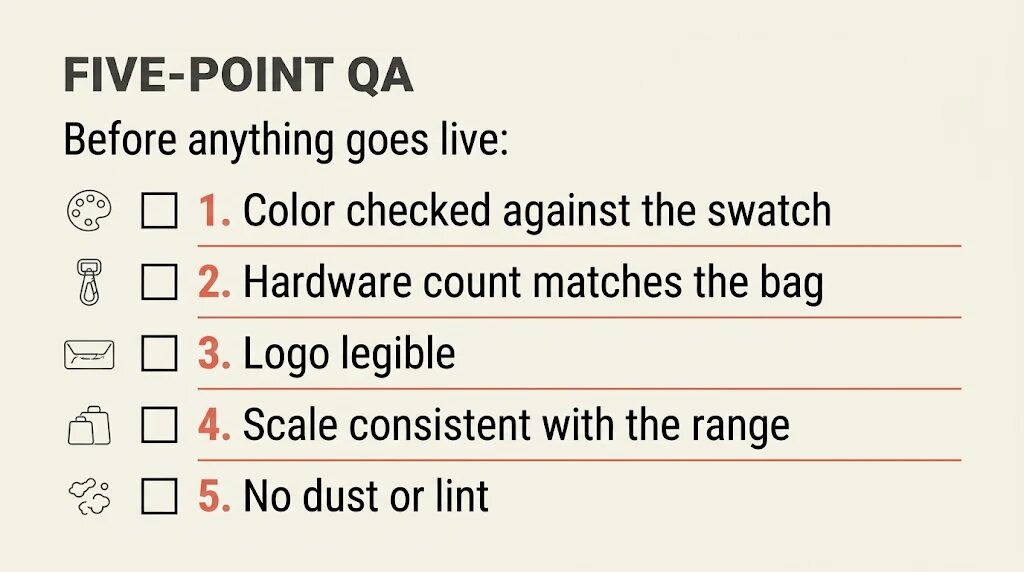
A five-point QA before anything goes live:
☐ Color checked against the swatch
☐ Hardware count matches the bag
☐ Logo legible
☐ Scale consistent with the rest of the range
☐ No dust or lint
Bag Product Page Media: Images, Video, 360 and 3D
With the images edited, the next question is how they work on the page. The product page needs a clear image sequence first, then richer media that answers questions a still image cannot, such as how a bag moves, opens, and sits at true size.
How many images does a bag product page need?
Typically eight to ten, in a fixed order: hero, angles, scale, detail, interior, lifestyle. Amazon recommends at least six images and Walmart at least four, so treat those as floors, not targets. Complex bags and luggage need more.
Video, 360 spins, and 3D viewers for bags
Beyond the image gallery, three richer formats are worth knowing, and each answers a different question for your bag product. Video shows movement and use, 360 spins show every side, and 3D viewers and AR show structure, scale, and detail on the shopper’s terms. Remember, rich media pays off most on considered purchases such as luggage and technical packs.
An important pointer re videos: Show opening and closing, capacity, strap adjustment, wheels rolling, and the handle extending, in 9:16, 1:1, and 16:9. Most brands make videos for hero products only. Packshots and video rendered from a 3D asset are some ways around that.
Samsonite is a useful reference. Digital Commerce 360 reported in January 2025 that it was adding interactive 3D and AR across brands including TUMI and American Tourister, and reusing the assets in social, email and ads. In early online testing, its VP of digital and ecommerce told NBC News that shoppers who interacted with the 3D models were 50% more likely to become paying customers. Its team also said in the webinar that 3D-based ads drew strong engagement. Before that, it had 3D video for only three or four hero collections.
Page speed and image SEO
Richer media raises an obvious worry, which is whether it will slow the page down. Samsonite’s team feared slow mobile loads but found it wasn’t an issue. Standard fixes still apply: WebP, responsive sizes, lazy loading, a CDN, and heavy media loaded on demand.
Speed aside, search engines also need to understand your images. For image SEO, name files descriptively and write alt text that says what is shown. Good: “Black leather tote, front view.” Good: “Carry-on suitcase, handle extended.” Bad: “bag image 1.” Add Product structured data with an image array, following Google Search Central, and keep text out of the images themselves.
Bag Photography for Wholesale and Marketplaces
The product page isn’t the only place your images have to work. Wholesale buyers and marketplaces are the others, and each has its own constraints. Wholesale content has to exist before the product does, and every marketplace has its own image rules. A master set plus a workflow that exports channel variants beats reshooting for each one.
Wholesale catalogs and line sheets
Start with wholesale, where timing is the main problem. Buyers and reps need consistent images of every colorway, line sheets, and retailer-ready asset packs, usually before final photo samples exist. Shooting prototypes shows details that may change, heavy retouching drifts from the real product, and a late catalog costs selling time.
Pre-production samples carry flaws such as glue marks and placeholder hardware. Retouching can clean marks but should not invent hardware. Digital samples built from a 3D model can cut the physical sample burden.
Marketplace and retailer image requirements (US)
Marketplaces shift the problem from timing to rules. Here’s what each platform’s official seller guidelines say, checked November 8, 2026. None publishes bag-specific rules there.
Platform |
Main image rule |
Bag-relevant notes |
Size and format |
Source |
|---|---|---|---|---|
Amazon |
Pure white (RGB 255, 255, 255); product fills 85% of frame |
No props; not included; six+ images recommended |
500 px minimum, 1,000+ recommended; JPEG preferred |
|
Walmart |
Pure white (255, 255, 255); crop close |
No accessories included; four+ images recommended |
2,200 x 2,200 px, 1:1; JPEG, PNG, or BMP, 5 MB max |
|
eBay |
Accurate; no borders, text, or watermarks |
More than one photo recommended |
500 px minimum, longest side |
|
Etsy |
Accurate color, scale, and materials |
One unedited photo of the actual item required |
2,000 px recommended |
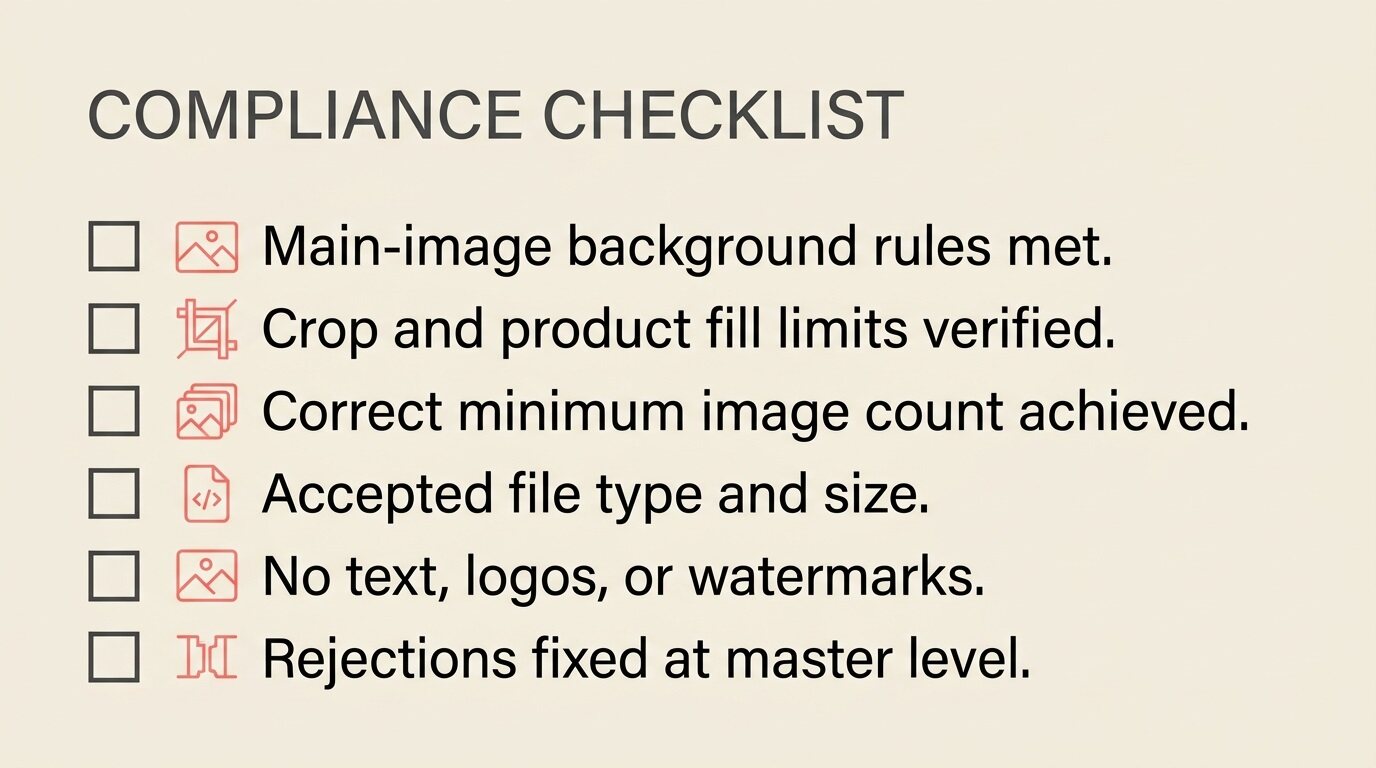
Compliance checklist:
☐ Background meets the main-image rule
☐ Crop and product fill within limits
☐ Image count at or above the recommendation
☐ File type and size accepted
☐ No text, logos, or watermarks on the main image
☐ Rejections fixed at the master, not per channel
If you sell in Europe, Zalando publishes a dedicated Bags and Luggage image guide (JPG up to 20MB, with advice to stuff bags to show shape and capacity) and updates it regularly. Everywhere, the workflow is the same: shoot or render one master set, then export variants per channel.
How to Handle Colorways, Sizes, Seasons and Late Samples in Bag Photography
Delivering images to every channel is manageable for one bag. The strain starts when you multiply it across a catalog: families times sizes times colors times views. Samples also rarely arrive when the calendar needs them, so plan for both before the first shoot is booked.
Colorways and sizes
Take an illustrative range of 12 families, each in 2 sizes and 4 colorways, shot from 9 views. That is 96 products and 864 images in one season. These numbers are illustrative, not industry data.
Families |
Sizes |
Colors |
Shots per product |
Total images |
|---|---|---|---|---|
12 |
2 |
4 |
9 |
864 (illustrative) |
You can shoot every color, shoot a hero color and recolor in editing, or generate variants digitally. Recoloring breaks down on prints, patterns, reflective trims, hardware, and heavy textures. A workable rule: new materials or patterns need new capture; a new color on the same construction often does not.
Seasonal refreshes
Colorways multiply the work within a season. Seasons multiply it again. Libraries go stale when the brand look, backgrounds, formats, or retailer rules change. Reshoot what sells and carries over; let discontinued styles age out. Lock the style guide before the season’s shoots begin.
Late, scarce and pre-production samples
Then there’s the timing problem we flagged in the wholesale section. Pre-production samples arrive early but flawed; production samples are right but late. Marks and glue can be retouched; wrong hardware cannot. Often one sample serves photo, sales, marketing and PR, and every shipment adds risk.
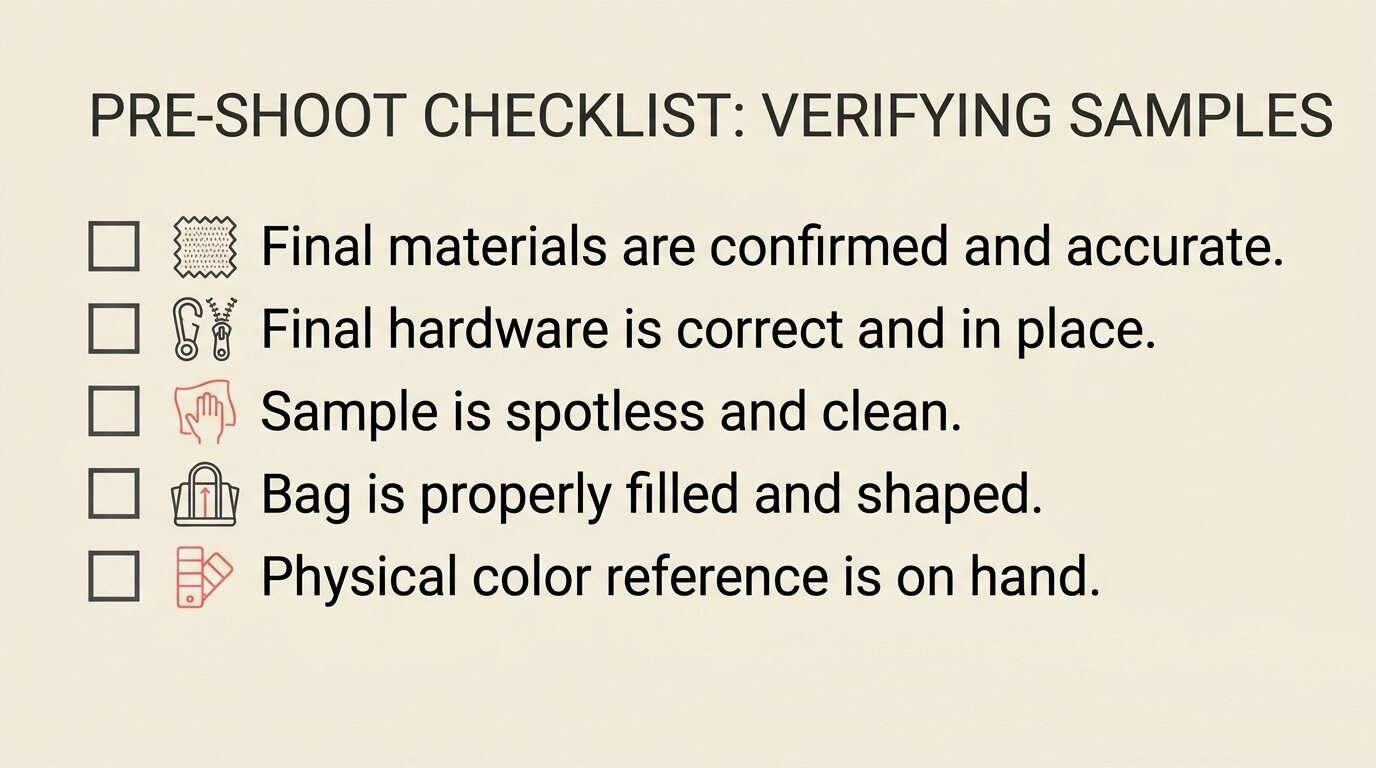
Schedule backward: start at the wholesale catalog and launch dates, then subtract approval, editing, and shoot time to find the latest day a sample can arrive. Before it goes on set, check that it is shoot-ready:
☐ Final materials
☐ Final hardware
☐ Clean
☐ Shaped
☐ Color reference on hand
Shooting early with a flawed sample saves time but risks a reshoot. The comparison section covers ways to depend less on physical samples.
How Product Photos Affect Bag Returns
All of this effort comes down to one moment, when the shopper opens the box. When a bag looks different from its photos, it comes back. Bags are especially prone to surprises in size, color, and material, so the best images remove those surprises before checkout.
- What shoppers misjudge: size and capacity, color in real light, how the material feels, strap length, and interior layout.
- What images can do: scale shots, printed dimensions, true color and interior views.
- How to use your own data: tag returns by reason and SKU, then reshoot or add media for the worst offenders.
Samsonite’s team linked richer 3D media to fewer returns in the webinar, because it narrows the gap between screen and reality.
How Much Does Bag Product Photography Cost?
Returns are one cost of images that miss. The other is the cost of making the images in the first place, and it’s worth adding up properly. Cost depends less on the day rate than on how many images, shoots, reshoots, and samples your range needs, so measure your cost per SKU before you compare any alternative to shooting.
Start with a year of spend. Add up photographer and studio time, styling, models, retouching, sample shipping, reshoots, internal time, and asset management. Then count what that spend produced: SKUs published, colorways per SKU, and images per SKU. Studios price per image, per SKU, or by day rate, and per-image pricing looks cheap until colorways multiply.
Cost per SKU = total annual content cost ÷ SKUs published
For example, a brand that spends $120,000 a year on content and publishes 400 SKUs pays $300 per SKU (illustrative). Run the same math on your own numbers. Reshoots and slow turnaround show up in that total, so note how many reshoots you ran and how long a sample took to reach a live page.
Building a Scalable Bag Photography Workflow
Once you know your cost per SKU, the next question is how to run production so that number stays under control. Scale comes from process, not heroics. A clear brief and style guide, consistent naming, set approvals, and one place for every asset are all critical. Build these once and each season starts from a working system.
- The brief and style guide: A shot list per bag type, styling conventions, color references, deliverables, and deadlines.
- Asset management and naming: One naming convention, versioning, and a single source of truth for every image.
- In-house, agency, or hybrid:
Model |
Strengths |
Weaknesses |
Best when |
|---|---|---|---|
In-house |
Control; fast reshoots |
Fixed cost; capacity limits |
Volume is steady and predictable |
Agency |
Flexible capacity; specialist skills |
Less control; briefing overhead |
Peaks and campaigns |
Hybrid |
Core in-house, peaks outsourced |
Two workflows to align |
Large ranges with seasonal spikes |
- Metrics: Track time to live page, cost per SKU, reshoot rate, and return rate.
Bag Photography vs CGI vs 3D Scanning vs AI Images: Which Should You Use?
A tight workflow makes shoots run smoother, but every shoot still costs time and money. So it’s fair to ask whether another way of producing the images fits your catalog better. You can produce bag imagery in four ways: studio photography, CGI from design files, 3D scanning of physical samples, and AI image generation. They differ in what they need as input, how they scale, and how closely they match the real product.
Method |
Input |
Accuracy |
Consistency |
Cost as catalog grows |
Reuse |
Best for |
Main limits |
|---|---|---|---|---|---|---|---|
Traditional photography |
Sample |
High if done well |
Drifts |
Repeats per shoot |
Low |
Editorial, small ranges |
Reshoots, timing |
CGI from CAD |
Design files |
Varies |
High |
Low per variant |
High |
Clean CAD files |
Color mismatch; web conversion |
3D scanning |
Sample |
True to sample |
Highest |
Capture once, cheap variants |
High |
Large ranges, many colors |
Needs sample; some post-work |
AI generation |
Prompt, photo, or 3D model |
Depends on grounding |
Varies |
Low |
Medium |
Lifestyle, ads |
Can invent details |
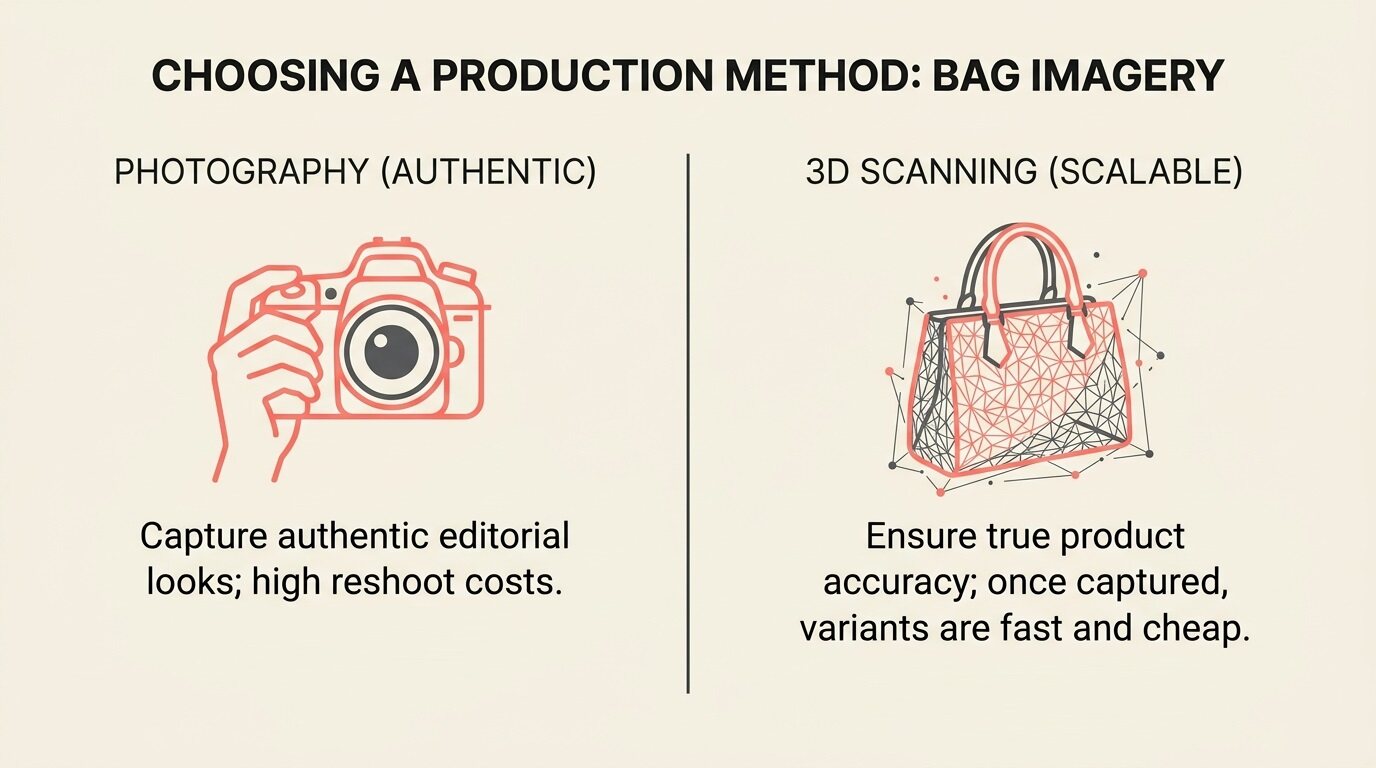
Traditional photography is strong for authentic and editorial work, but every shoot costs money, and drift is hard to control. CGI from CAD works when production-ready files exist, but colors may not match the real product, and manufacturing files often do not convert cleanly for the web.
3D scanning starts from the real sample, so shape and color are true, with an up-front capture and cheap variants after. AI generation is fast and flexible; accuracy depends on how closely it matches the real product.
These methods are often combined, for example, scanned assets feeding AI lifestyle scenes. For deeper comparisons, see 3D visualization vs photography, a footwear-focused look at photography, 3D scanning or AI generation, and this overview of 3D scanning for ecommerce.
Since the AI image generation method raises the most questions, we’ll take it on next.
Can AI Generate Product Images of Bags? What Works and What Doesn't
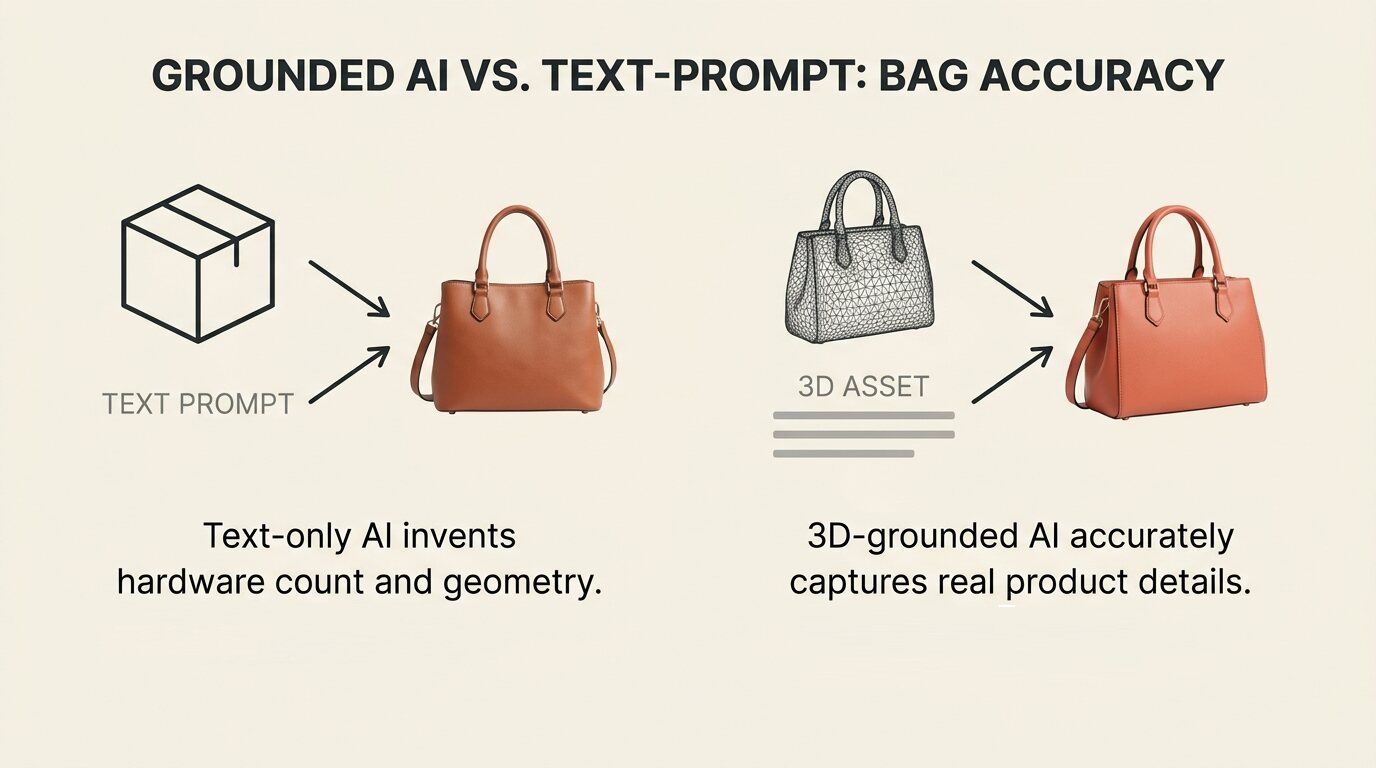
Yes, AI can generate product images for bags. However, the accuracy depends on whether the AI model is grounded in the real product. Prompt-only generation invents details; grounded generation does not.
Where AI helps. Lifestyle scenes, market-specific backgrounds, ad variants, and concept work.
Where generic AI struggles with bags. Hardware count and placement, stitching and seams, logos and text, strap and handle geometry, proportions, and color drift between generations. A prompt-only model has to guess all of these.
What “grounded in the real product” means. Generation is constrained by the real product’s shape and texture, usually from a 3D model of the actual bag, rather than imagined from a text prompt. The scene is generated; the bag is not.
How to QA AI-generated bag images. Compare each image to the physical sample, count hardware, check logos and stitching, and check scale and color. Then check each marketplace’s current policy: Amazon asks for a metadata tag when images show photorealistic AI-generated people, Walmart requires AI images to be truthful and accurate, and Etsy requires at least one unedited photo of the actual item. For a fuller walkthrough, see how to use AI for product photography.
That gives you all four options and an honest sense of each. The remaining question is which one fits your catalog
When to Keep Shooting and When to Go Digital: A Decision Framework
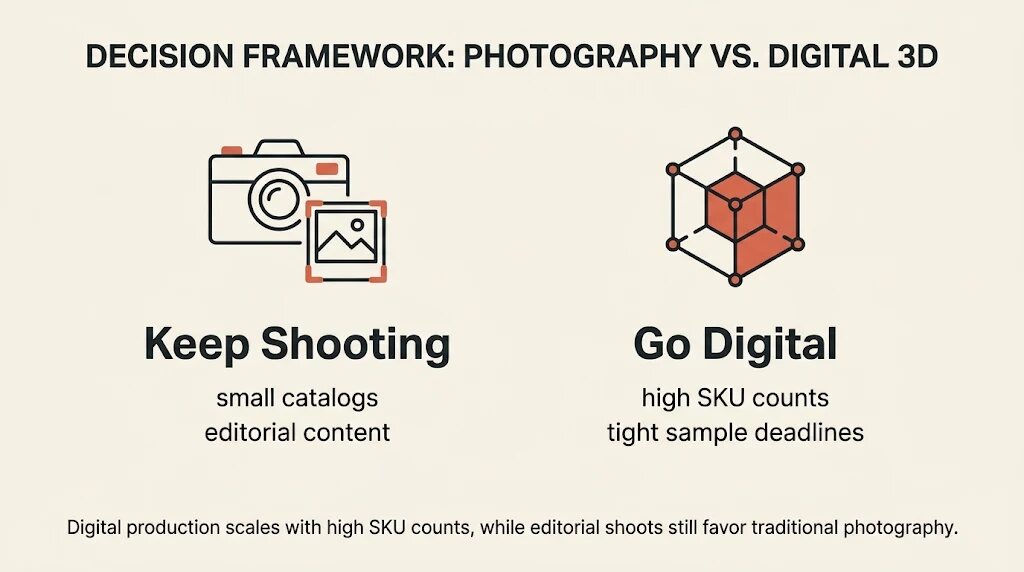
With all four options on the table, which one fits your catalog? For brands with a meaningful number of SKUs, digital production can replace shoots entirely. For small catalogs, it does not make sense, and photography should stay. The table below shows how colorways, seasons, and channels move the line.
Scenario |
Recommendation |
Why |
|---|---|---|
Small catalog, few launches a year |
Keep shooting |
Low volume; a well-run shoot is efficient |
Many colorways per family |
Go digital or hybrid |
Colors multiply shoot cost; digital variants do not |
Heavy wholesale and retailer needs |
Go digital or hybrid |
Assets needed before samples |
Several fixed-deadline launches a year |
Hybrid or go digital |
Studio leaves the critical path |
Heavy paid video needs |
Hybrid or go digital |
Video from a 3D asset scales past hero products |
Mostly editorial or campaign-led content |
Keep shooting |
Real places and people still favor photography |
Factors beyond SKU count: colorways per SKU, seasons per year, channels, reshoot frequency, sample availability and product complexity.
Our recommendation would be to test before you switch. Run a few products side by side and compare quality, time, and cost against your audit. Samsonite’s team put it plainly in the webinar: with ten products, 3D felt like a gimmick; the value came when it covered the range.
Common objections to 3D-scanned bag product photography
Before switching, teams tend to raise the same four questions, so here are straight answers.
- “Will digital match photographic realism for leather and technical details?” Test it: check seams, hardware, texture, and color against the swatch. Scan quality matters, and some materials need work after capture.
- “Do buyers still need physical samples?” Some will, especially for technical products. Hybrid is a valid answer.
- “We tried 3D, and it didn’t scale.” Usual reasons: single-product tools, in-house scanners, files that would not convert, pilots that never grew.
- “Does editorial photography go away?” No. Content built on real places and people still favors photography.
For the long version, see 3D visualization vs photography.
From Photoshoots to Scalable Bag Content: How Fibbl Fits
Let’s pull this together. Good bag photography shows size, structure, material, and color truthfully and stays consistent. For a small catalog, a well-run shoot is the right answer. The problem appears at scale.
The signs are many colorways per family, samples that arrive after the catalog is due, repeat reshoots, video that never gets past hero products, and an in-house 3D attempt that stalled. If that list sounds familiar, here’s where Fibbl comes in.
Fibbl is a 3D and AR platform for footwear, bag, and luggage brands. You send samples to its Warsaw studio and get back true-to-life 3D assets that power a 3D viewer, AR, packshots, product video, and AI lifestyle imagery. Fibbl has scanned more than 20,000 shoes and bags for brands including Samsonite, TUMI, GANT, Rains, Gola, and Gaerne.
Samples are prepped first, as described earlier, to Fibbl’s standard or your own conventions. Fibbl’s ARC scanner then captures 300 to 500 images per product under cross-polarized light, with sub-millimeter accuracy and true color, at up to 80 products per shift. Assets can be delivered within 24 hours of capture. Colorways come from digital recoloring, and unique patterns need a new scan.
From that 3D model, Fibbl’s AI builds lifestyle imagery on the real product geometry rather than a generic image model. It is informed and trained on millions of data points and can produce very realistic pages.
Samsonite shows what this looks like at scale. It rolled out 3D and AR across Samsonite, TUMI, and American Tourister. The company is 3D-first in 19 markets. It reported a 37% increase in conversion and a 33% higher add-to-cart rate. In a separate online test, it saw shoppers who interacted with the 3D models were 50% more likely to become paying customers.
That said, 3D-scanned product photography isn’t for every catalog. For brands with multiple colorways, digital production can replace shoots entirely. For smaller catalogs, keep shooting.
The simplest way to judge it is to try it on your own product. Send one or two samples to the Warsaw studio, pay only shipping, and get a 3D model with access to the viewer, packshots, and AI imagery. For costs, see pricing.
Get a free product scan | Book a demo
Bag Product Photography FAQs
How many photos does a bag product listing need?
Typically eight to ten core images: hero, angles, scale, details, interior, and lifestyle. Complex bags and luggage need more. Amazon recommends at least six and Walmart at least four, so plan above those floors.
What is the best background for bag product photos?
Clean white or a light neutral for catalog images. It keeps focus on the product and meets marketplace rules; Amazon and Walmart require white main images. Lifestyle backgrounds are extras.
How do you stuff a bag for product photography?
Fill it with tissue or soft packing paper so it holds its natural shape without bulging. Push the corners out, smooth creases, and avoid fillers that could transfer ink onto light fabrics.
How do you photograph shiny hard-shell luggage without reflections?
Use very large soft light sources, flags, and cross-polarization. Angle the case so any remaining reflections fall where they do not hide ridges, logos, or hardware, then check each shot at full size.
How do you show the size of a bag in photos?
Combine printed dimensions that match the spec sheet, a familiar scale reference such as a person or laptop, and a “what fits” shot. For luggage, add cabin-size context and a person beside the case.
How much does bag product photography cost?
It depends on how many images, shoots, reshoots, and samples your range needs, not just the day rate. Work out your cost per SKU with the audit above before comparing any alternative.
Can AI generate product photos of bags?
Yes, but accuracy depends on grounding. Prompt-only tools can invent hardware, stitching, and proportions; generation grounded in the real product keeps them true. Check every image against the physical sample.
Is 3D better than photography for bags?
For large catalogs with many colorways, often yes: one capture produces every view and variant. For small catalogs, no; a well-run shoot is simpler. The decision framework above sets out the full criteria.